Hello Everyone! In our attempt to keep you engaged and progress your business to stay productive, we have worked on yet another version of our app in Mac OS adding new features, giving you the ability to do more on the go. Get access to the latest version of Apptivo App from your Mac systems directly.
Let us now walk through the complete list of new features and enhancements rolled out in Mac OS Desktop: 1.0.1
- My Work Queue
- Add New option for Standard Fields
- Customer Price List
- Contacts App Conversion
- Leads App Conversion
- Items of Interest for Lead & Opportunity
- Closed Loss Reason
Apptivo Mac OS Desktop: 1.0.1 Updates
My Work Queue
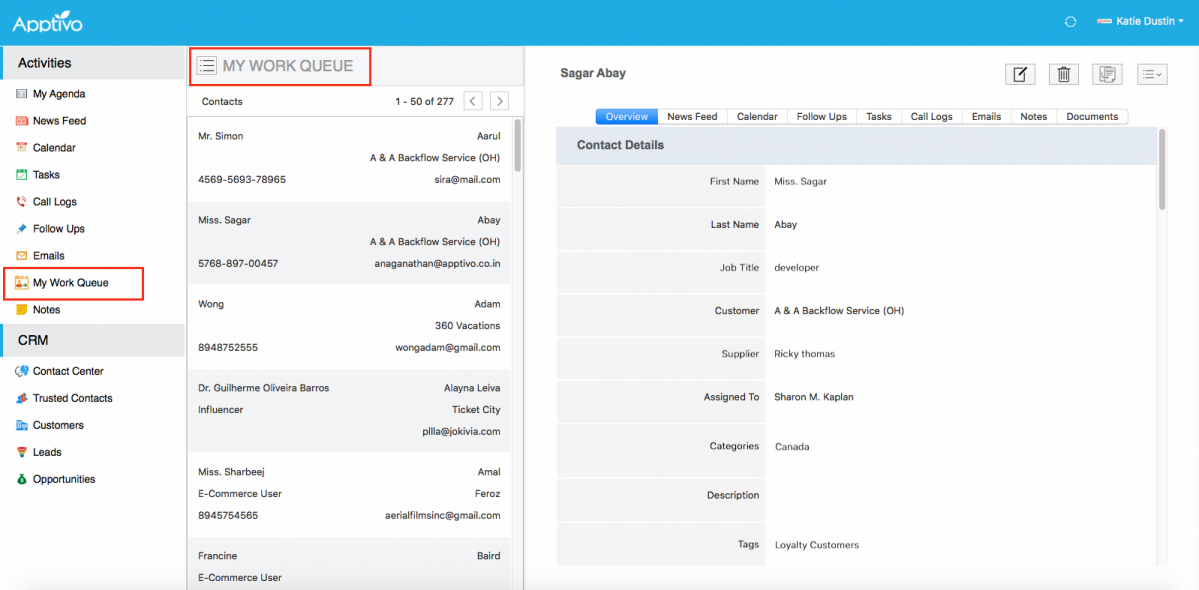
My Work Queue isn’t something new in Apptivo. It has been in the web version, and now it has advanced to the Mac OS. Using this, you can view all your CRM objects (Leads, Contacts, Customers, and Opportunities) in one single dashboard.
|
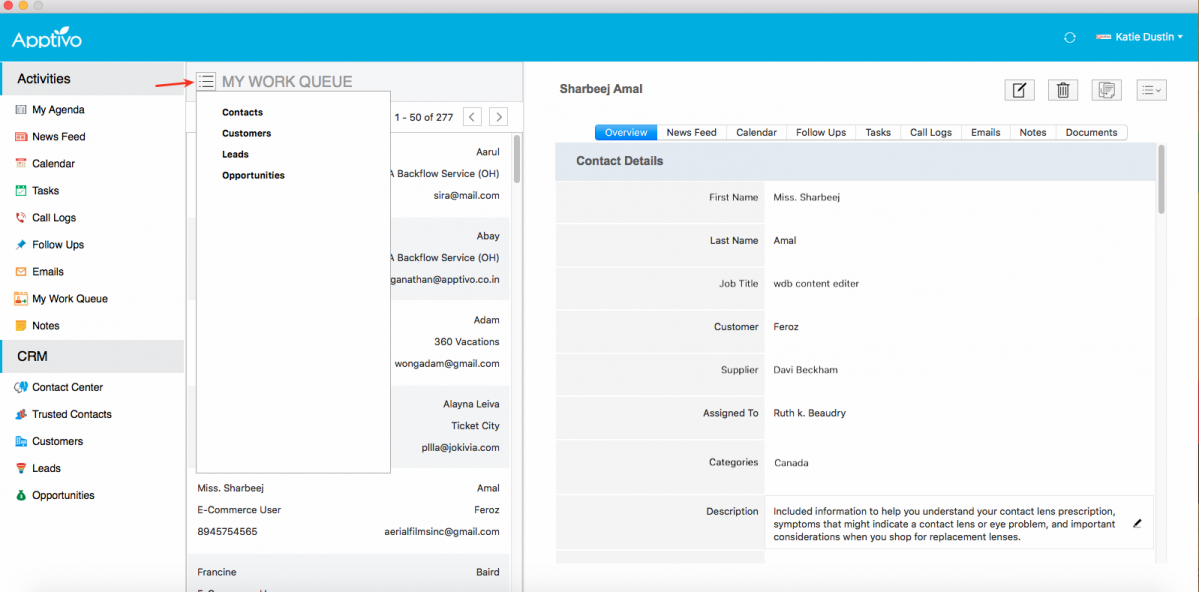
By default, Contacts will be listed. To view other objects, click on More icon.
|
Add New for Standard Fields
One of the cool updates in this release is the Add New option for all the Standard Fields present. While adding options to a field, it will by default, list the values already created, allowing you to select a value. Now this feature update gives you the ability to create new options at runtime.
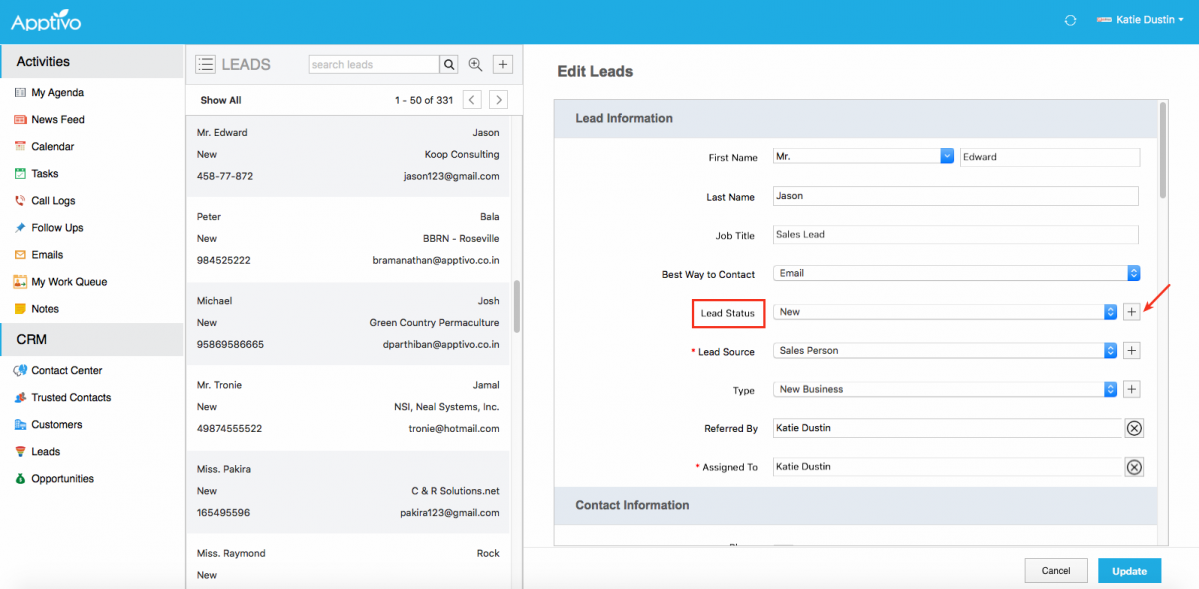
For instance: Consider the Leads App, where you would like to create a new Lead Status. You can do it instantly, by just clicking on the “+” icon found at the end of the Lead Status field.
|
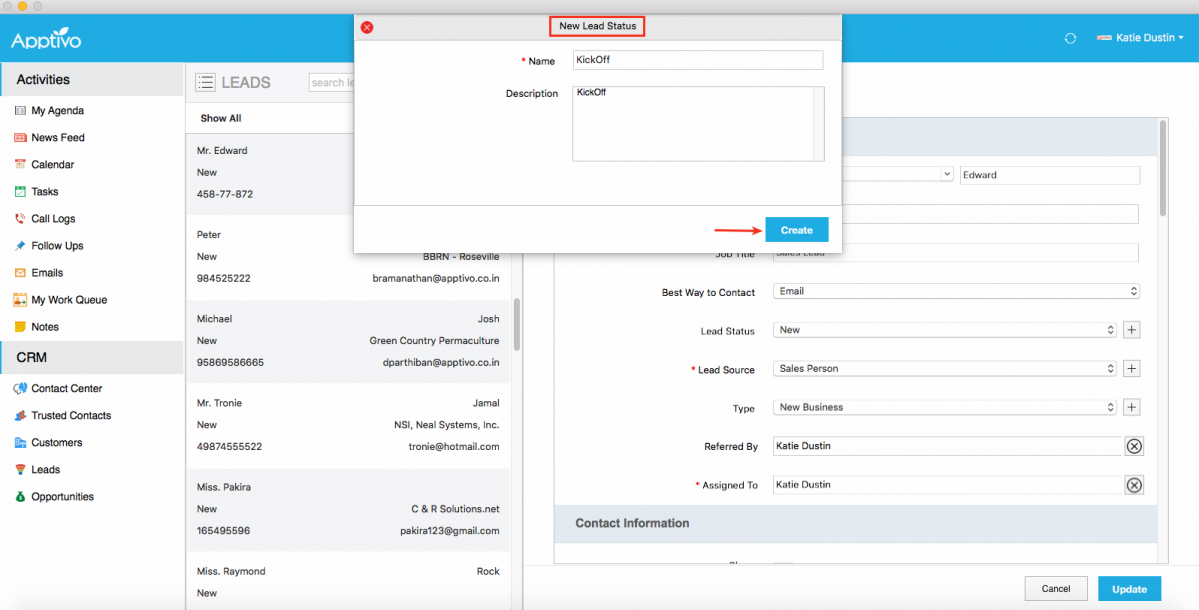
On clicking, you will be displayed with New Lead Status popup as shown in the image below. Fill in the details and click Create.
|
Price List in Customers App
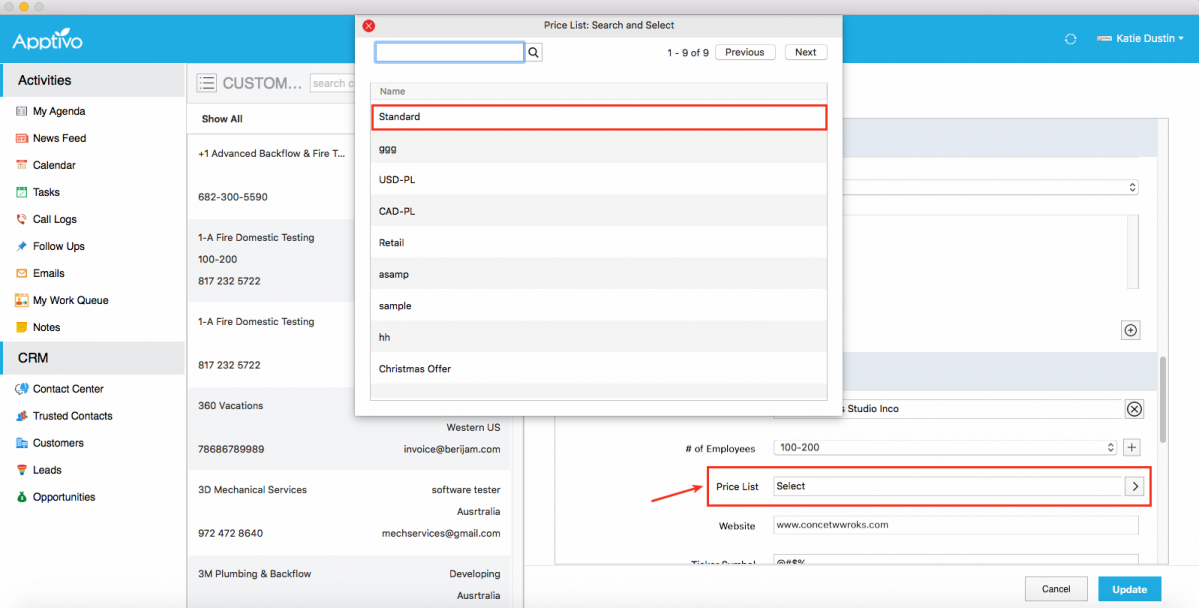
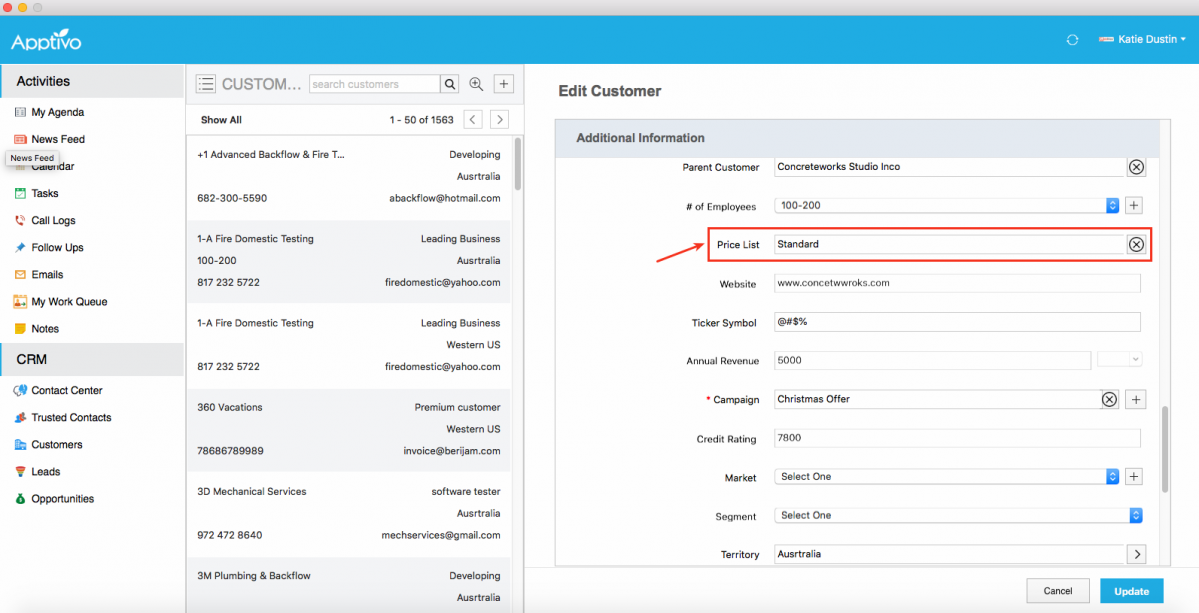
In this release, we have added the Price List field separately in the Customers App under the Additional Information section. This feature will now give you the ability to add the required price list for your customers in the Creation page. It is also possible to edit the Price List value anytime you require.
On clicking on the side drop down in the Price List field, Price List: Search & Select pop up will be displayed listing all the price lists created in the Pricing App.
|
Select the required price list and it will be added to the customer.
|
Conversion
A notable feature in this release is the feature of Conversion. Apptivo Mac V1.0.1 brings in the following conversion options to your Mac OS:
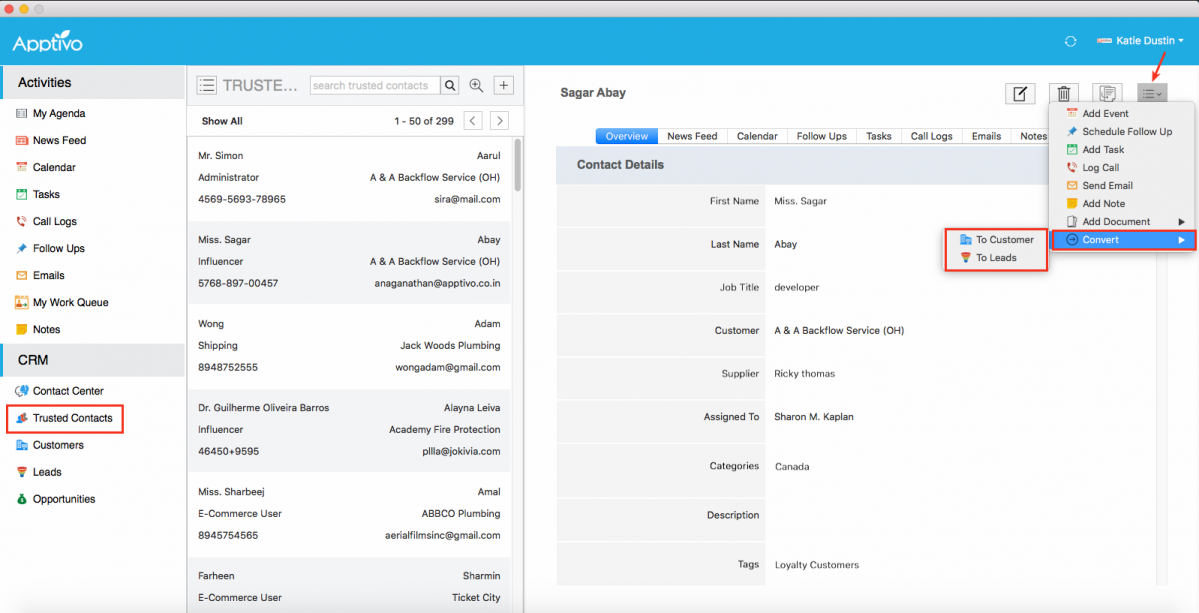
- Contacts App Conversion – Your contacts can now be converted to a Customer or Lead. To convert, click on the More dropdown found in the Contacts Overview page -> Convert option.
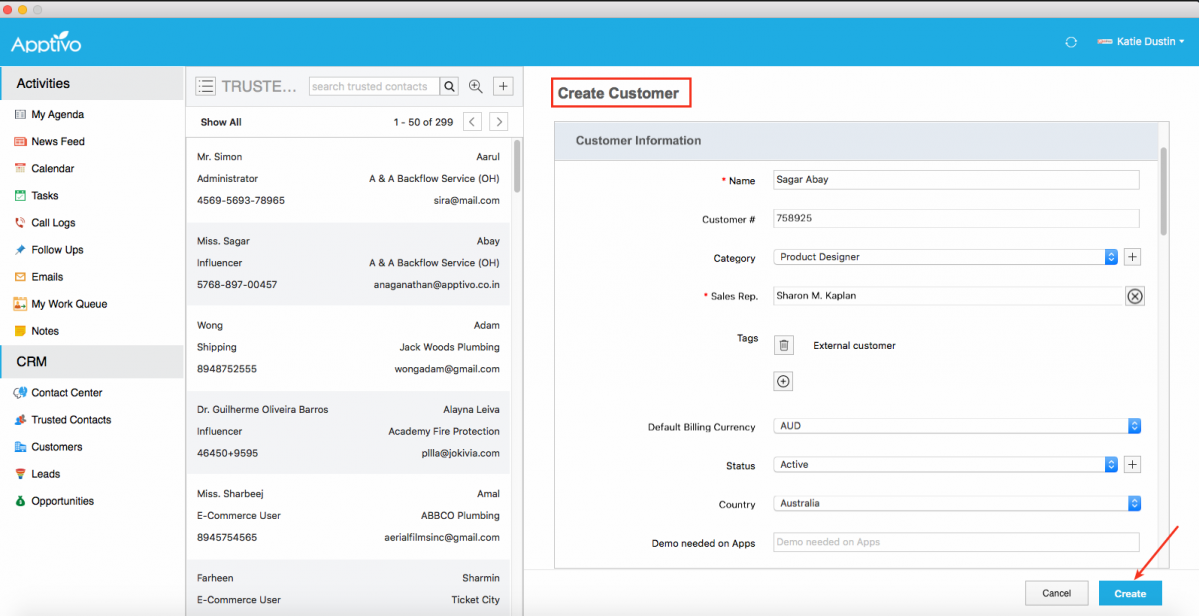
For instance: Click on To Customer. Contact details will be auto-populated in the Create Customer page. Click on Create to convert your contact to a customer.
- Leads App Conversion – Similarly, you can convert a Lead to a Customer or Contact or an Opportunity. To convert, click on the More drop-down found on the Leads Overview page -> Convert option.
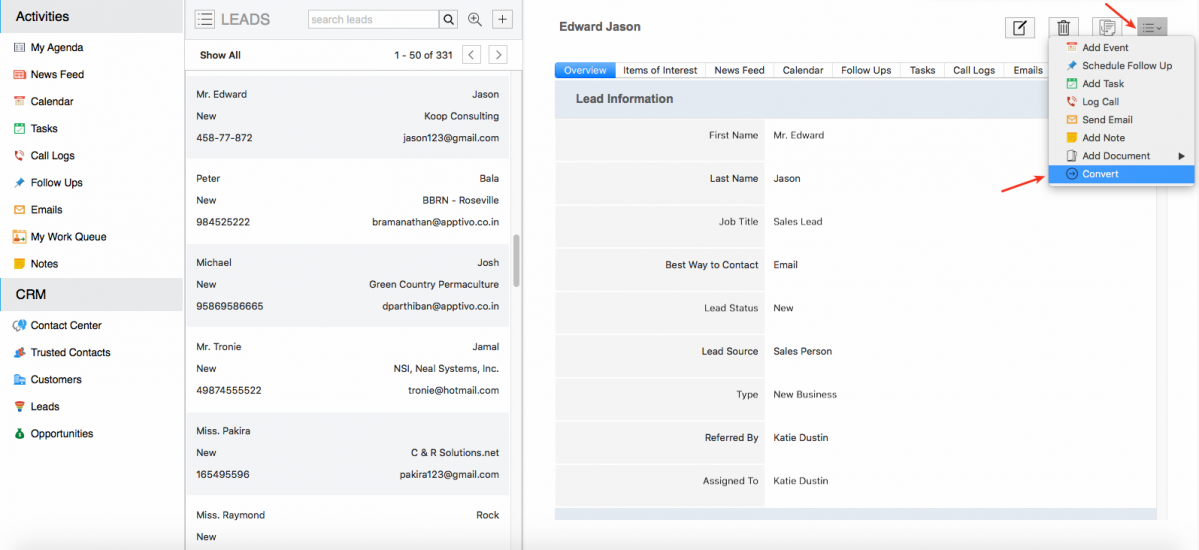
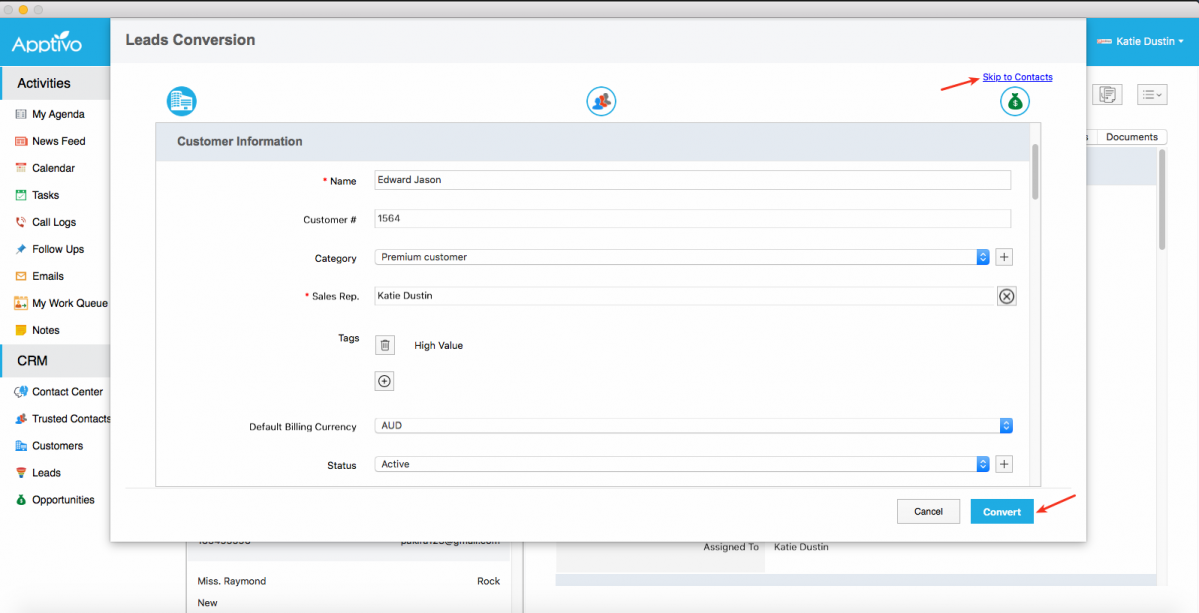
On clicking, Leads Conversion popup will be displayed, where you can convert the Lead to a Customer or Contact or Opportunity. Here, we are converting it to Customer. Lead details will be auto-populated in the Create Customer page. Click on Convert to convert your lead to a customer. You can also directly convert your lead to a contact, by clicking on the Skip to Contacts link found at the top right corner.
Items of Interest for Lead & Opportunity
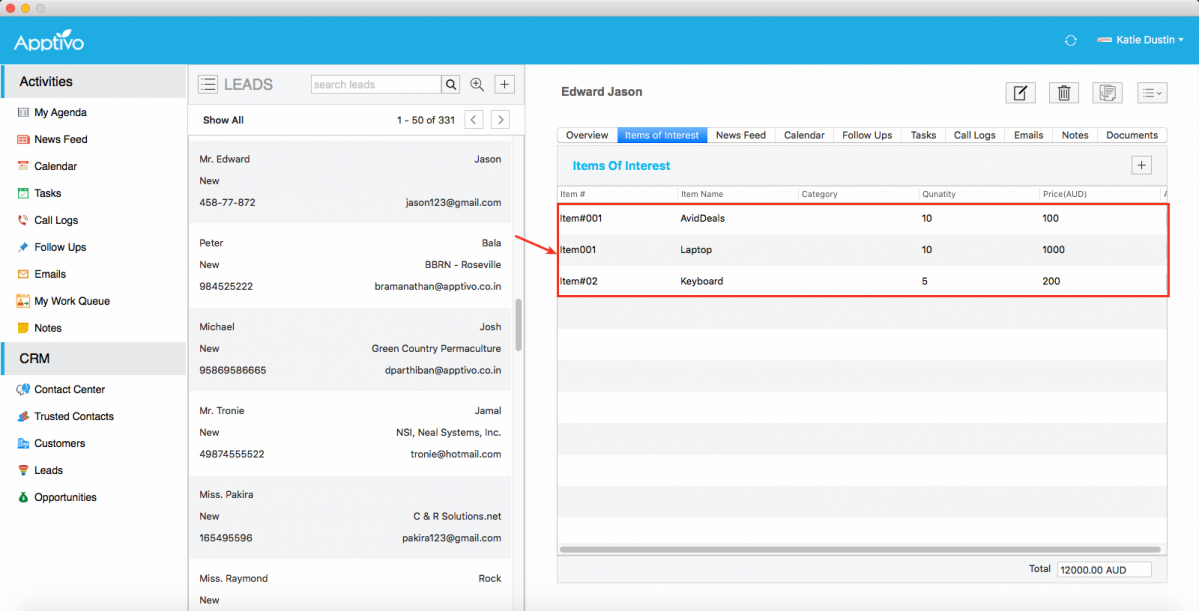
We have added the Items of Interest tab to both the Leads and Opportunities App. This tab will allow you add items from your product database that a lead or an opportunity is interested in buying.
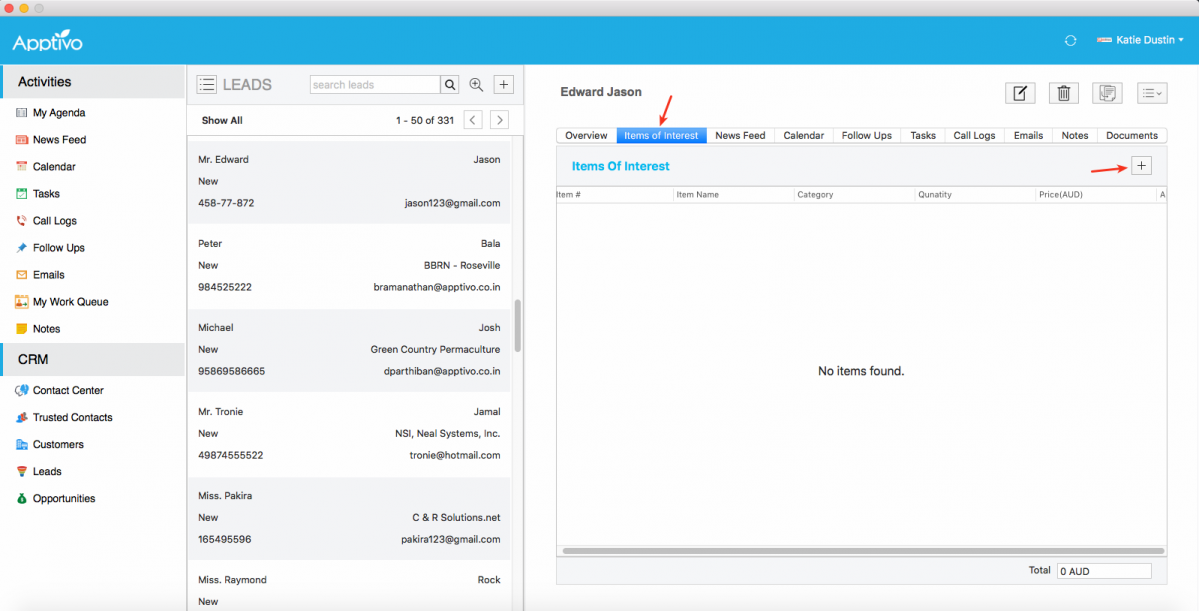
For instance: Consider the Leads App. Click on the Items of Interest tab found next to the Overview. And click the Add “+” icon.
|
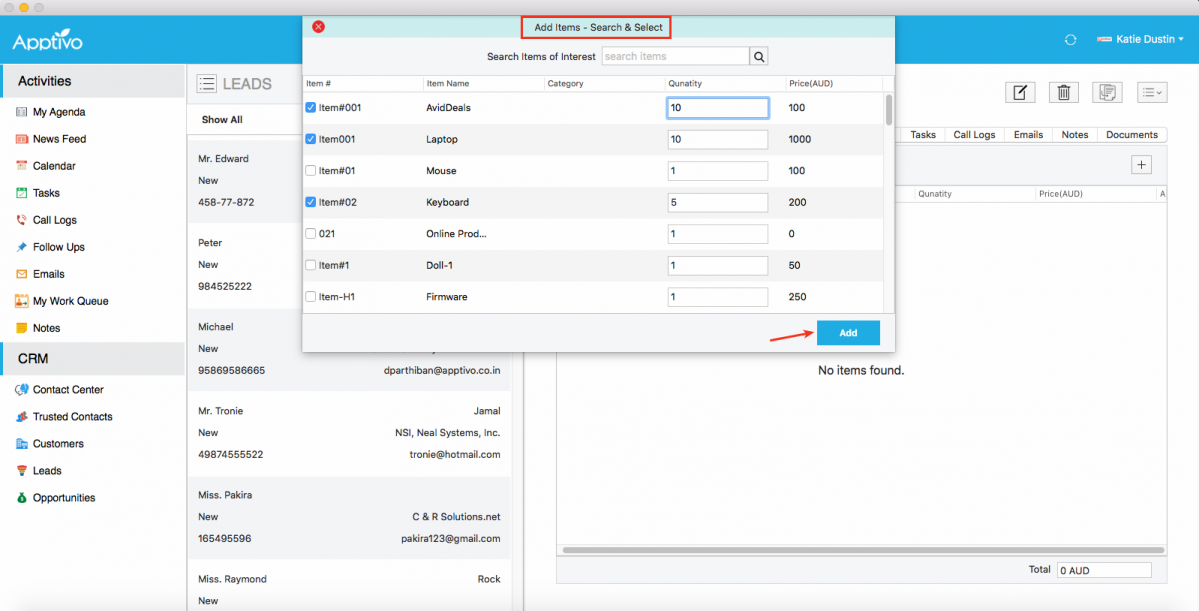
On clicking, Add Items – Search & Select popup will be displayed with the list of items from Items App. You can select the item that the lead is interested in, enter the required quantity and click Add.
|
The items will now be added to the lead as shown in the below image:
|
Closed Loss Reason
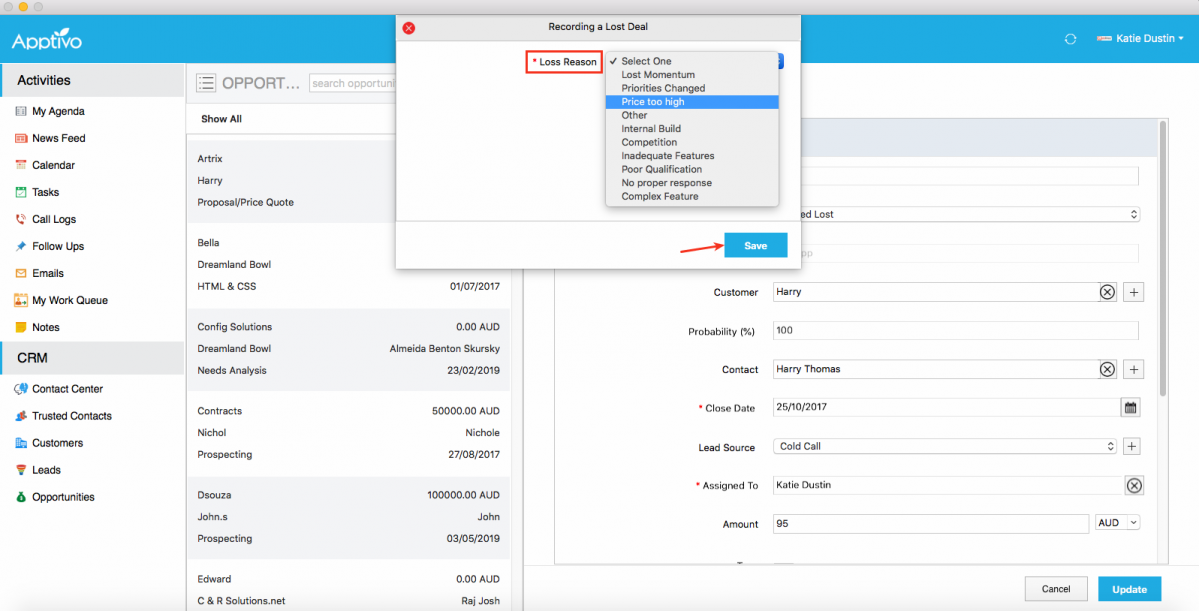
In this version update of Mac OS, we have added a new feature of recording the reason for losing an opportunity in the Opportunities App. This allows your sales rep to enter the reasons for not closing a deal, which can be used for future references.
Now when an opportunity moves to the Closed Lost Sales Stage in your Mac OS desktop, Recording a Lost Deal popup will appear as shown below. Click on Save button once the reason is entered.
|
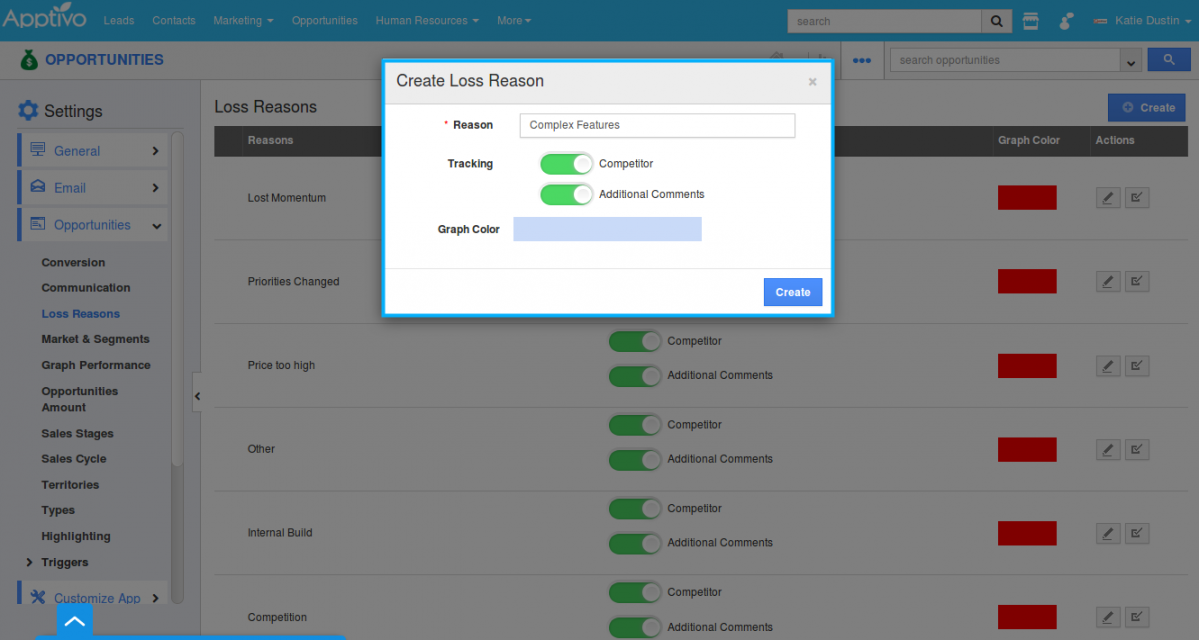
Note: Besides the default loss reasons provided, you can create your own loss reasons in the web version which gets reflected on your Mac device. Go to Opportunities App Settings -> Opportunities -> Loss Reasons.
|
Try these features out and if you have any queries, feel free to contact us at support@apptivo.com. Meet you soon with another fresh set of updates!.
Latest Blogs

Role Of CRM In Travel And Tourism Industry
Travel and tourism have been a significant part of everyone’s life since the ancient period. When we skim through the pages of history, It should be noted that humans were initially nomads before they became settled in one place. They...
Read more →
WHAT IS CRM TECHNOLOGY?
Introduction CRM is a technology that helps manage the entire customer information and interactions in order to build and maintain superior customer relationships. The CRM solution replaces spreadsheets and other different applications, which makes it easy for the businesses to...
Read more →
Everything you need to know about the Annual Maintenance Contract!
1. What is an Annual Maintenance Contract? 2. Benefits of Maintenance Contracts 3. How can Apptivo CRM help you manage maintenance agreements and vendors? 4. Summary Think about getting the confidence that the machinery is well-maintained and performing optimally, without...
Read more →
