Relocate Fields

Apptivo offers you a set of standard fields inside every app defined in a structured order. However, some of your business requirements and preferences differ! And this structured order of fields and sections cannot be used for all kinds of businesses. In such cases, Apptivo provides you with the ability to change the order of the fields, that is, you can easily relocate the fields and sections anywhere in the app page layout, you desire. It’s just a two-step process which can be instantly made – Drag, Drop, and Done! Isn’t it cool?

With this drag and drop method you can instantly move the fields around anywhere you want them. Have a look at the steps below to relocate fields and sections based on your business requirements.

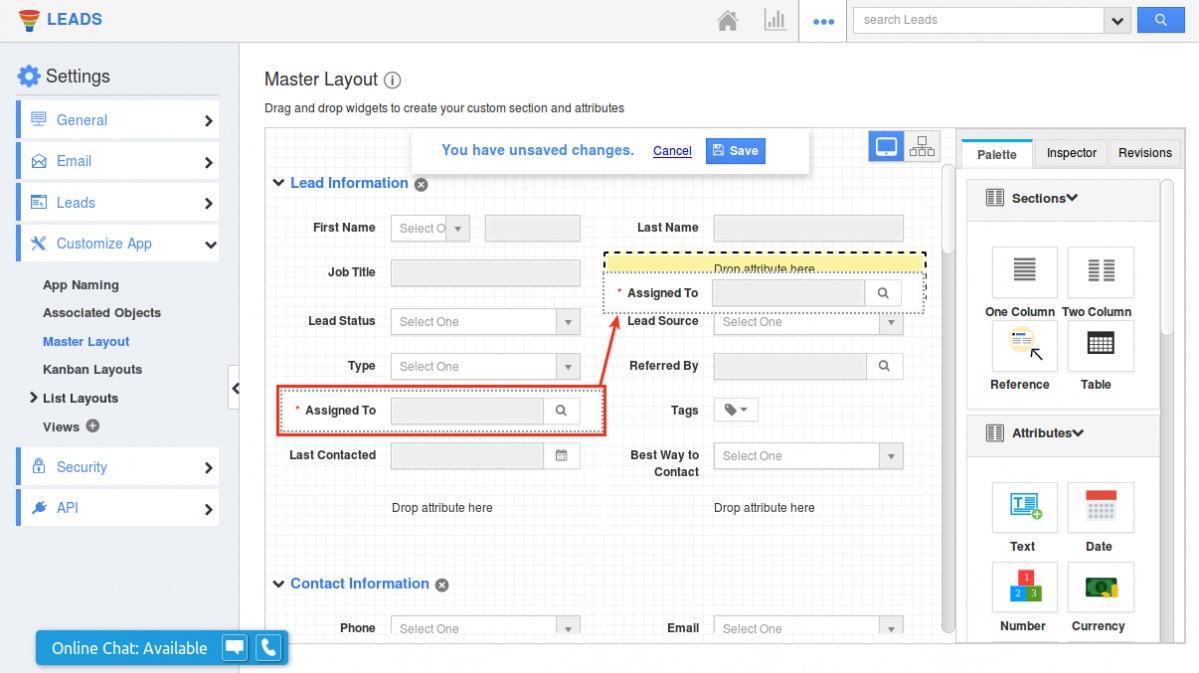
  1. For instance: Consider the Leads App, where you would like to have the Assigned To field right below the Lead’s Name.
  2. For that you can drag and drop the Assigned To field at the required place.
  3. Save the changes.
    relocate fields
  4. Now, in the Lead Creation page you can view the Assigned To field below the Lead’s Name as shown in the image below:
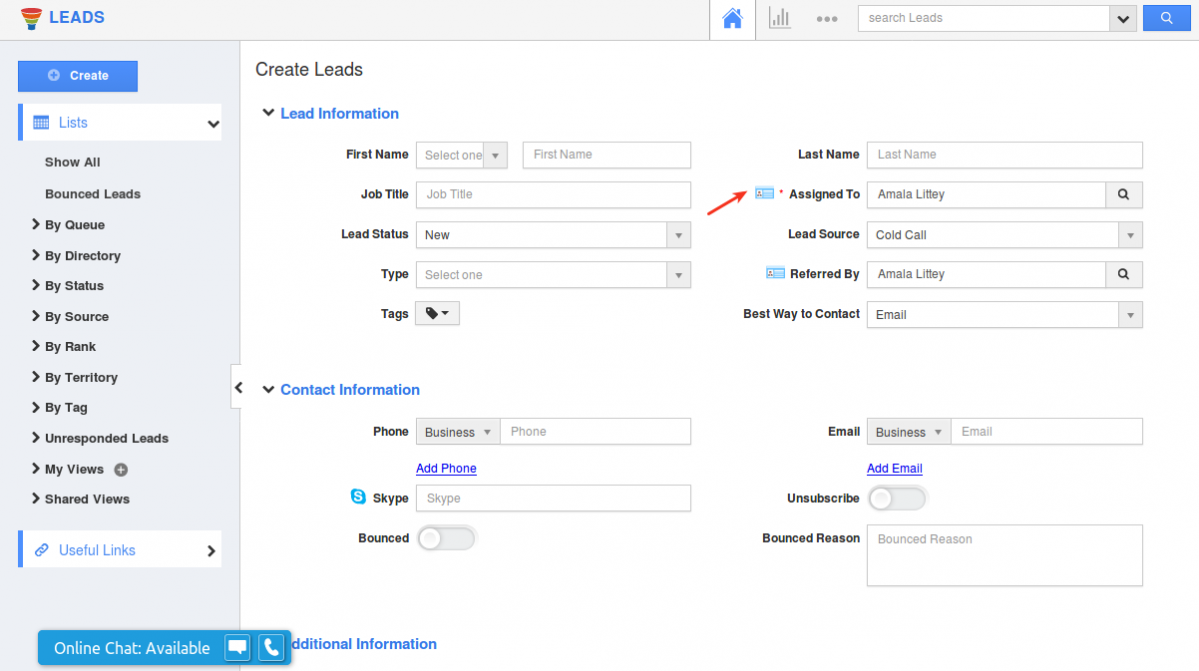
    fields relocated
  • Relocate Fields

    User Manual >> Documentation >> Customize Apps with custom attributes >> Relocate Fields

    Relocate Fields

    Apptivo offers you a set of standard fields inside every app defined in a structured order. However, some of your business requirements and preferences differ! And this structured order of fields and sections cannot be used for all kinds of businesses. In such cases, Apptivo provides you with the ability to change the order of the fields, that is, you can easily relocate the fields and sections anywhere in the app page layout, you desire. It’s just a two-step process which can be instantly made – Drag, Drop, and Done! Isn’t it cool?

    With this drag and drop method you can instantly move the fields around anywhere you want them. Have a look at the steps below to relocate fields and sections based on your business requirements.

    1. For instance: Consider the Leads App, where you would like to have the Assigned To field right below the Lead’s Name.
    2. For that you can drag and drop the Assigned To field at the required place.
    3. Save the changes.
      relocate fields
    4. Now, in the Lead Creation page you can view the Assigned To field below the Lead’s Name as shown in the image below:
      fields relocated