Email to Case

Incoming email messages are created as cases in the Cases app. The customer receives the case created as an acknowledgment email. You can automatically create a case when a customer emails you for support. You can use email ids or aliases to receive emails from your customers.

How do I Authenticate My Email Address?

Follow these steps to authenticate your email address

  • Log in and access the Cases app from your universal navigation menu bar.
  • Click on the “More” icon and select “Settings” located at the app header bar.
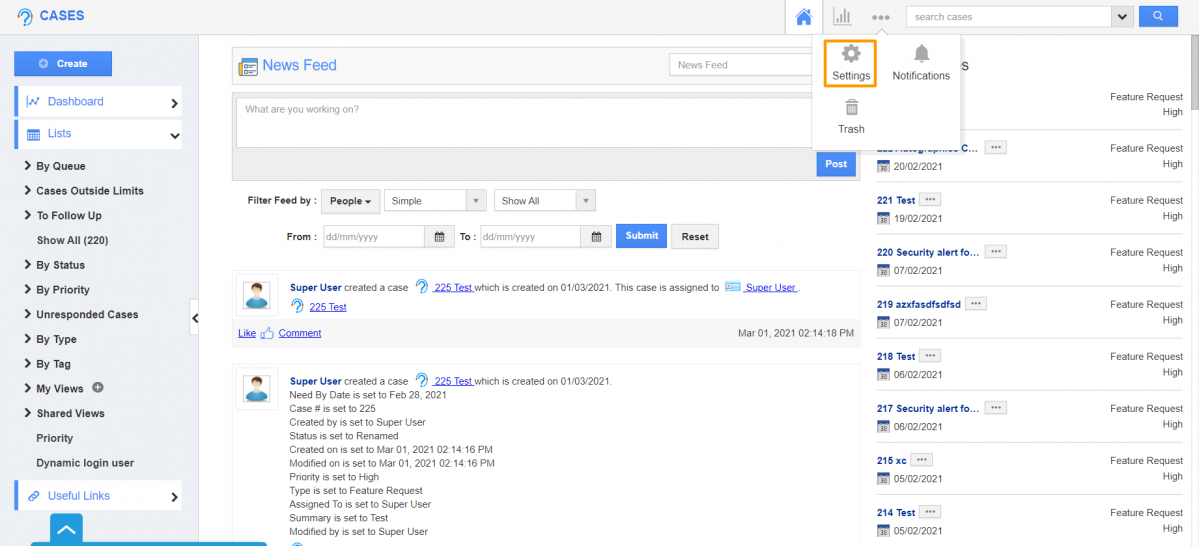
Cases app
  • Click on Email → “Email to Case” from the left navigation panel.
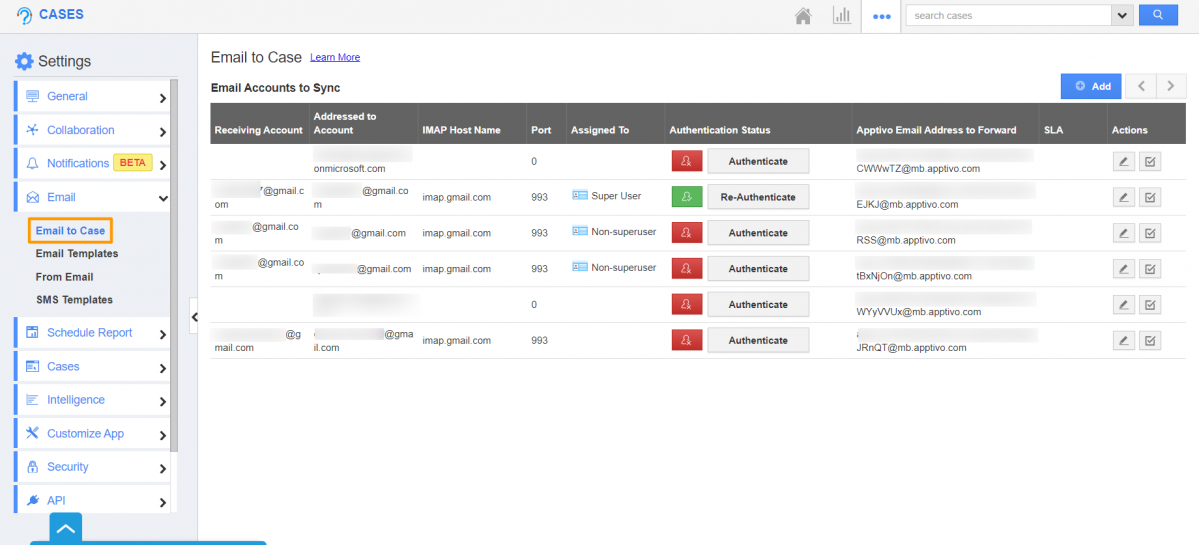
Email To Case
  • This feature is available starting from the Premium plan of Apptivo.
  • Click on the “Add” button to add an email address.
  • Fill in the following details:
    • Receiving Email Account – Your Email address for authentication.
    • Password – Enter the password of your email address.
    • “Addressed To” Email Account – Either you can choose the same account or can redirect to the email list.
    • IMAP Host Name – Host name of your email address. For example: if you have a Gmail account then the host name is “imap.gmail.com”.
    • Port – Port number of the domain. For example, the port number for Gmail is 993.
    • Assigned To – Select an Employee to whom it should be assigned automatically.
    • From Email Id – When composing a message you can set this authenticated email address. If you want to use this email id when composing, click on the “Off” button to enable “On”.
    • Add to CC – Add the authenticated email id to the CC list, if it is not selected as from address.
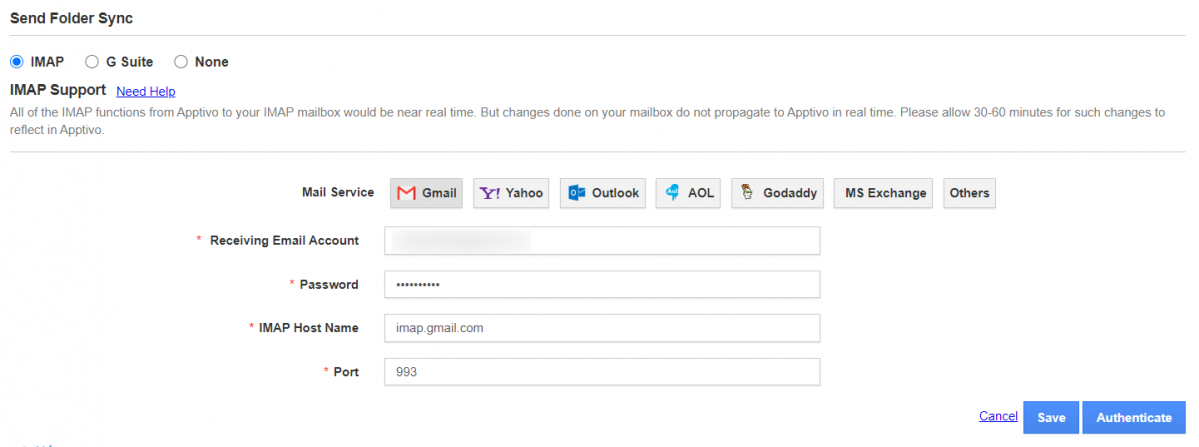
IMAP Support
  • Click on the “Authenticate” button to authenticate your email address.

For Example: A contact named “Parker Ehlers” composes an email from “Parkerehlers2013@gmail.com” and sends it to the authenticated email address “sofiameyer2013@gmail.com”. His email will be converted as a case in the Cases app. You can view the email case in “My Cases” as shown in the image below:
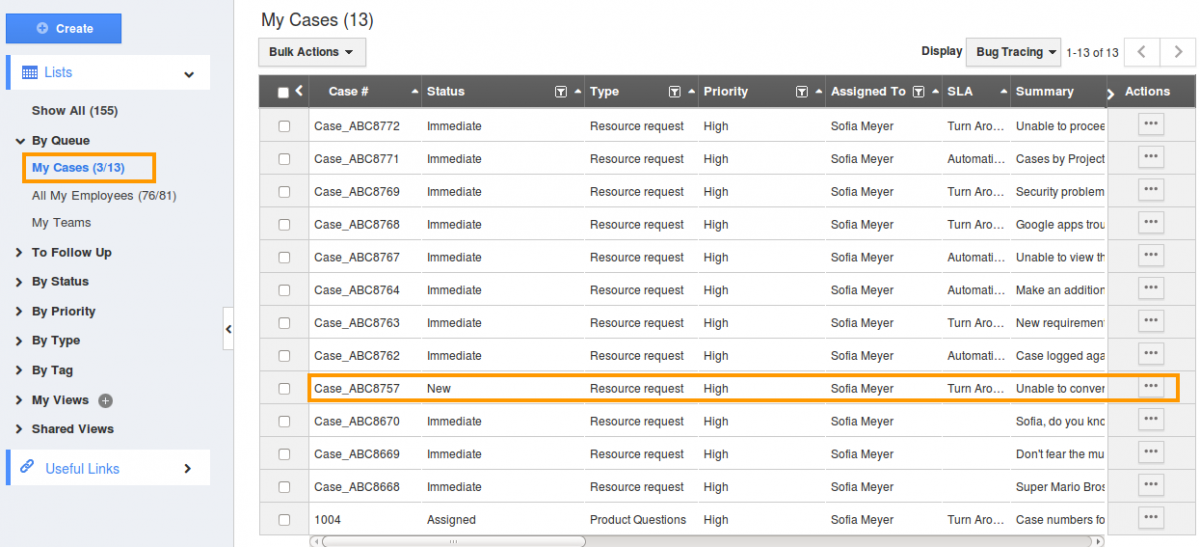
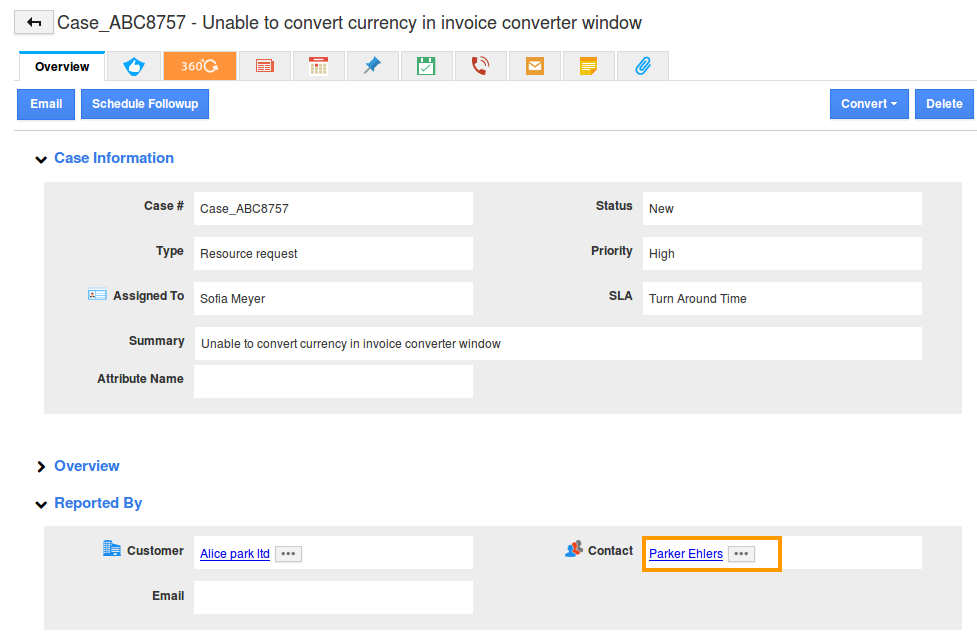
my cases cases overview

Similarly, “Parker Ehlers” also created a contact in Contacts App with that email address. You can view “Parker Ehlers” in the Contacts App. Parker Ehlers will receive an acknowledgment mail from Cases App.

  • Email to Case

    User Manual >> Documentation >> IMAP Email Overview >> Email to Case

    Email to Case

    Incoming email messages are created as cases in the Cases app. The customer receives the case created as an acknowledgment email. You can automatically create a case when a customer emails you for support. You can use email ids or aliases to receive emails from your customers.

    How do I Authenticate My Email Address?

    Follow these steps to authenticate your email address

    • Log in and access the Cases app from your universal navigation menu bar.
    • Click on the “More” icon and select “Settings” located at the app header bar.
    Cases app
    • Click on Email → “Email to Case” from the left navigation panel.
    Email To Case
    • This feature is available starting from the Premium plan of Apptivo.
    • Click on the “Add” button to add an email address.
    • Fill in the following details:
      • Receiving Email Account – Your Email address for authentication.
      • Password – Enter the password of your email address.
      • “Addressed To” Email Account – Either you can choose the same account or can redirect to the email list.
      • IMAP Host Name – Host name of your email address. For example: if you have a Gmail account then the host name is “imap.gmail.com”.
      • Port – Port number of the domain. For example, the port number for Gmail is 993.
      • Assigned To – Select an Employee to whom it should be assigned automatically.
      • From Email Id – When composing a message you can set this authenticated email address. If you want to use this email id when composing, click on the “Off” button to enable “On”.
      • Add to CC – Add the authenticated email id to the CC list, if it is not selected as from address.
    IMAP Support
    • Click on the “Authenticate” button to authenticate your email address.

    For Example: A contact named “Parker Ehlers” composes an email from “Parkerehlers2013@gmail.com” and sends it to the authenticated email address “sofiameyer2013@gmail.com”. His email will be converted as a case in the Cases app. You can view the email case in “My Cases” as shown in the image below:

    my cases cases overview

    Similarly, “Parker Ehlers” also created a contact in Contacts App with that email address. You can view “Parker Ehlers” in the Contacts App. Parker Ehlers will receive an acknowledgment mail from Cases App.