You can collect leads when a user emails you. You can use email ids or aliases to receive emails from your users.
If a user sends an email to authenticated email address then he will be collected as a lead with his email address.
How do I Authenticate My Email Address?
- Log in and access Leads App from your universal navigation menu bar.
- Click on “More” icon and select “Settings” icon located at the app header bar.
- Click on “Email to Lead” from the left navigation panel.
- Click on “Add” button to add the email address.
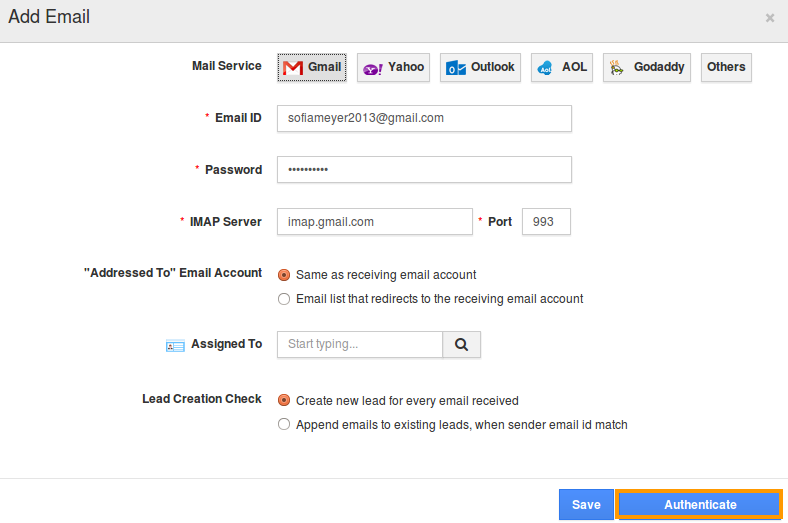
- Fill in the following details:
- Receiving Email Account – Your Email address for authentication.
- Password – Enter the password of your email address.
- IMAP Host Name – Host name of your email address for example: if you have Gmail account then host name is “imap.gmail.com”.
- “Addressed To” Email Account – Either you can choose same account or can redirect to email list.
- Port – port number of the domain for example: port number for Gmail is 993.
- Assigned to – Name of the employee. All the customers created through email would be assigned to this employee.
- Click on “Authenticate” button to authenticate your email address.
- A user named “Mark Jordan” composes an email from “jordanmark2013@gmail.com” and send to authenticated email address “sofiameyer2013@gmail.com”.
- His email will be converted as a lead in Leads App.
- You can view newly created lead in “My Leads” as shown in the image below:
- Once the lead has been created you can convert the lead into contact, customer and opportunity.


Email to Lead was last modified: November 4th, 2020 by

