User Manual >> Documentation >> Timesheets App >> Timesheets Basic Features

Timesheets Basic Features

Basic Features

Create New Timesheet

  1. Begin to type the customer name field will auto populate/ create new customer.
  2. Set a start and end date for the timesheet.
  3. Type a task and link the timesheet to a previously created project.
  4. Add multiple tasks if needed.
  5. Add the hours spent on each task.
  6. Accumulate the total number of hours at the bottom.
  7. Hit “Create” will save the timesheet as a draft.
  8. Hit “Create and Submit” will submit to the designated customer or manager Note: a customer is not required (A customer is only required if you wish to invoice for this timesheet).
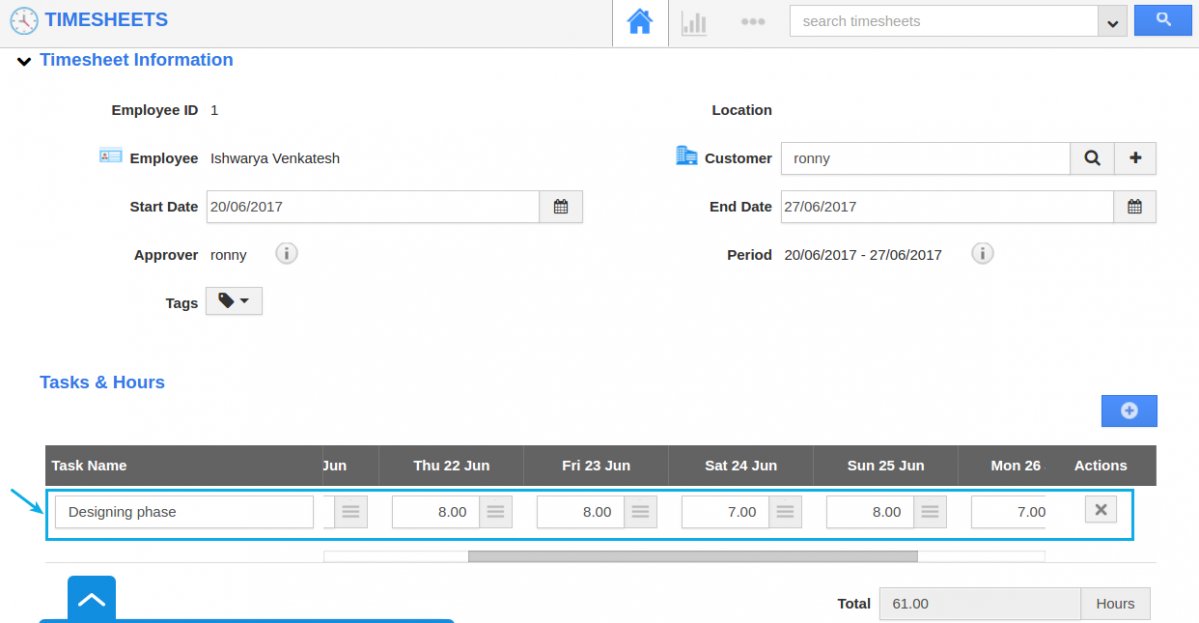
    Create new timesheet

Creating Timesheet for Project

  1. Create timesheet from the project.
  2. Select the project you would like to use.
  3. Set the start and end date,
  4. Select the task to create a timesheet for.
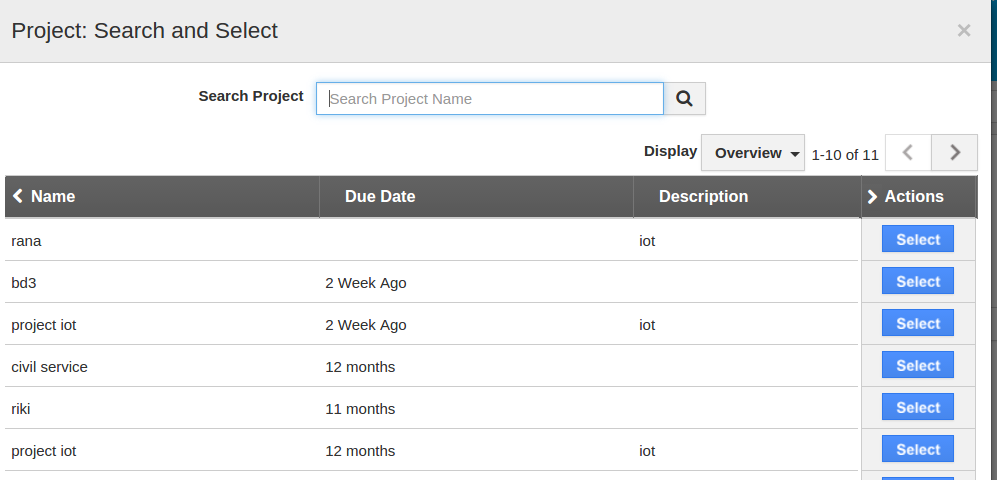
    Create Timesheet from projects

Track hours for my Project

  1. Records the start and end time of the tasks.
  2. It contains the detailed breakdown of tasks accomplished throughout the project. You can Log details of each task like date, hours spent, billing status.
  3. We’ve provided you with different options to configure the time period, to choose the timesheet based on users, and generate your customized timesheet reports.
  4. Billable hours – Time spent on tasks, which can be billed per working hour per day.
  5. Non- Billable hours – Time spent on tasks, which cannot be billed.

View team members Timesheet

Lists the timesheet created by others

This is the special feature; you can share your reports with your employee team. The reports shared by others also allowed to be viewed.

View the recent timesheets.

Recent timesheets display the timesheets created and modified recently; it displays them with status, task duration and total tracking hours.

Invoicing from the Timesheet

Generate Invoices and Bill your customer

The approved timesheet gets converted to an invoice. At once the timesheet is created with the customer name to which it has been invoiced it gets approved by the designated manager (project manager, customer manager or employee manager). While generating invoice for a timesheet the attributes like a customer, employee name and total hours accumulated for the tasks would be pre-populated. (The add services and add items are optional as per your requirement).
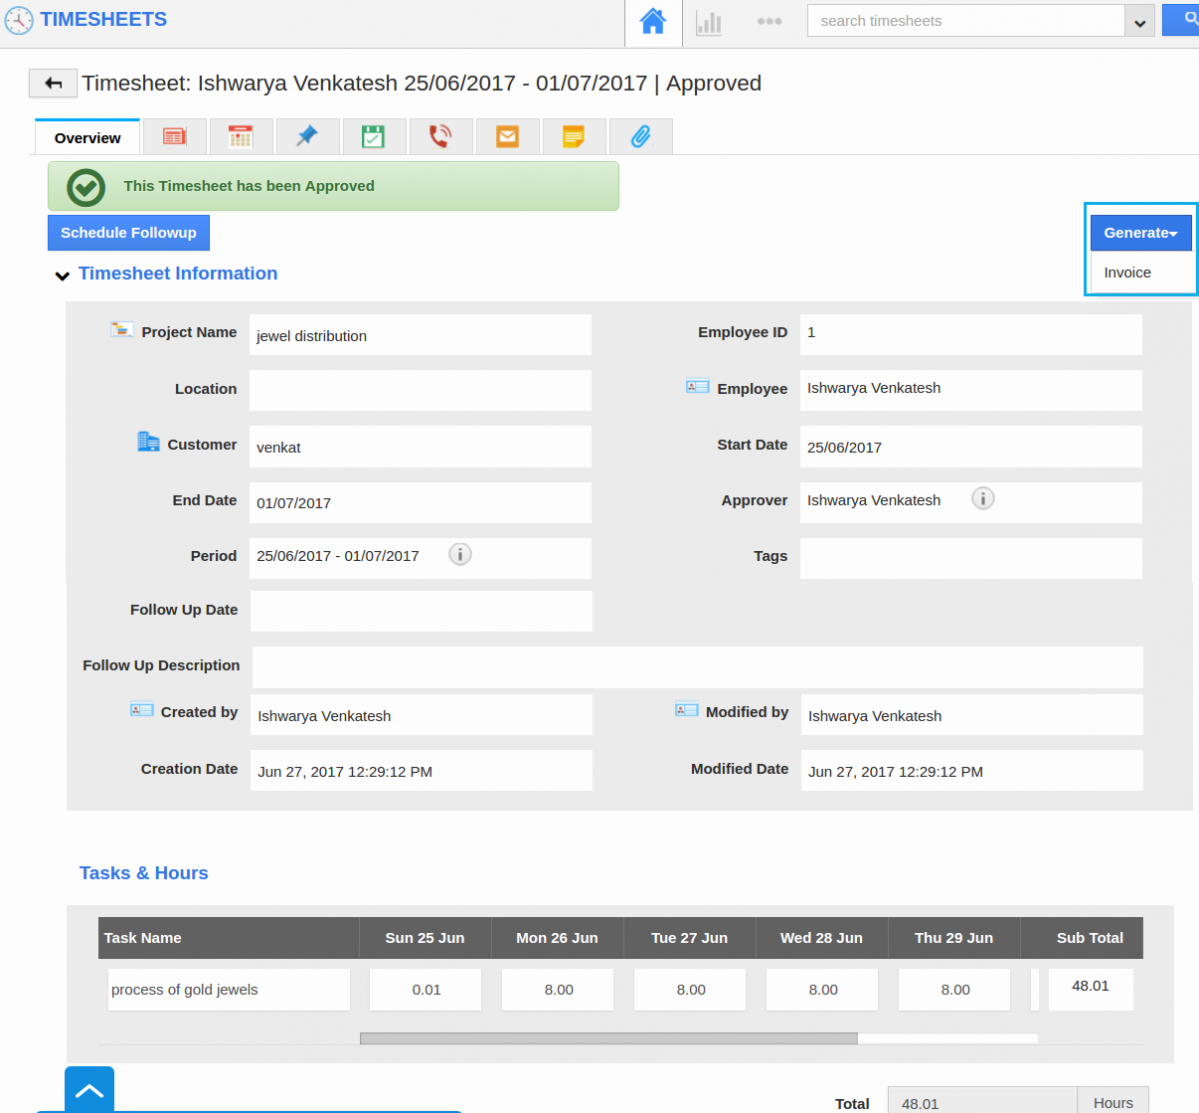

Generate an invoice

Accumulate the Work log duration

When the project converts into the timesheet, all the billable tasks involved during are listed. Each task can be specified with their work log duration. Timesheet tracks the work log as hours spent for the task completed in a given day.
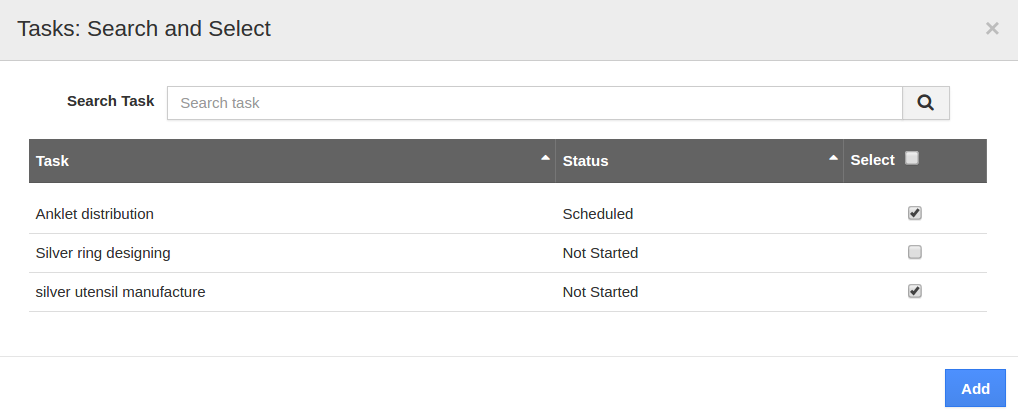
  1. Create a task in a project.
  2. Set the work log duration.
  3. Either convert the project into time sheet or create timesheet for project.
  4. Locate and select tasks from the list during the period.
  5. View the work log duration.
  6. Create and submit the time sheet to get approved from the concerned manager.

  7. Work log duration

  • Timesheets Basic Features

    User Manual >> Documentation >> Timesheets App >> Timesheets Basic Features

    Timesheets Basic Features

    Basic Features

    Create New Timesheet

    1. Begin to type the customer name field will auto populate/ create new customer.
    2. Set a start and end date for the timesheet.
    3. Type a task and link the timesheet to a previously created project.
    4. Add multiple tasks if needed.
    5. Add the hours spent on each task.
    6. Accumulate the total number of hours at the bottom.
    7. Hit “Create” will save the timesheet as a draft.
    8. Hit “Create and Submit” will submit to the designated customer or manager Note: a customer is not required (A customer is only required if you wish to invoice for this timesheet).
      Create new timesheet

    Creating Timesheet for Project

    1. Create timesheet from the project.
    2. Select the project you would like to use.
    3. Set the start and end date,
    4. Select the task to create a timesheet for.
      Create Timesheet from projects

    Track hours for my Project

    1. Records the start and end time of the tasks.
    2. It contains the detailed breakdown of tasks accomplished throughout the project. You can Log details of each task like date, hours spent, billing status.
    3. We’ve provided you with different options to configure the time period, to choose the timesheet based on users, and generate your customized timesheet reports.
    4. Billable hours – Time spent on tasks, which can be billed per working hour per day.
    5. Non- Billable hours – Time spent on tasks, which cannot be billed.

    View team members Timesheet

    Lists the timesheet created by others

    This is the special feature; you can share your reports with your employee team. The reports shared by others also allowed to be viewed.

    View the recent timesheets.

    Recent timesheets display the timesheets created and modified recently; it displays them with status, task duration and total tracking hours.

    Invoicing from the Timesheet

    Generate Invoices and Bill your customer

    The approved timesheet gets converted to an invoice. At once the timesheet is created with the customer name to which it has been invoiced it gets approved by the designated manager (project manager, customer manager or employee manager). While generating invoice for a timesheet the attributes like a customer, employee name and total hours accumulated for the tasks would be pre-populated. (The add services and add items are optional as per your requirement).


    Generate an invoice

    Accumulate the Work log duration

    When the project converts into the timesheet, all the billable tasks involved during are listed. Each task can be specified with their work log duration. Timesheet tracks the work log as hours spent for the task completed in a given day.

    1. Create a task in a project.
    2. Set the work log duration.
    3. Either convert the project into time sheet or create timesheet for project.
    4. Locate and select tasks from the list during the period.
    5. View the work log duration.
    6. Create and submit the time sheet to get approved from the concerned manager.

    7. Work log duration